I like to cover my small appliances with covers. Maybe it’s a Grandma thing, but I guess that’s okay, since I am a Granny! When I was younger, it was easy to find appliance covers, but they were almost always in solid colors. That’s just not my vibe. I like patterns and color, so I taught myself how to make my own!

I made covers for my InstantPot and for my toaster oven.
When we moved into our little farmhouse, I wasn’t going to use appliance covers because I have “plenty of cabinets” in the kitchen. We all know how that turned out! After a year here, I decided that I had better uses for that hidden storage and I installed a shelf in my kitchen for the small appliances. Between the cattle running on the land next to us, a dirt road, and our own farm animals, everything gets super dusty. So I started making appliance covers again. I don’t mind rinsing off something before I use it, but I really don’t want to scrub dirt off every time I get out the toaster oven!
The bigger stuff already has covers, but the small things, like my one-quart slow cooker still need covers. I sat down this morning to create a cover for it, so I thought I would share my process. I still use this little baby slow cooker pretty often, so it is still a valuable appliance for me.
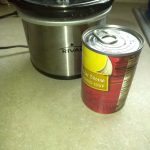
The 1 quart slow cooker. The soup can is there for size comparison.
As always, the first thing I did was to measure the appliance.
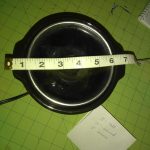
I always measure generously!
I added one inch to each measurement for seam allowance.
I sewed a small binding along the bottom. I do make lined appliance covers sometimes, but this little pot just needs something to keep the dust out…and I wanted to make just a quick little cover for it.
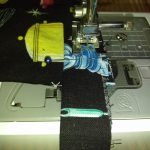
I used my presser foot as the guide for the seam.
Once the binding was on the edge, then I folded the piece in half and sewed a half inch seam. Then I trimmed the seam to one-quarter inch.
I left the side piece inside out and pinned the circle for the top in with right sides together. To make it easier, I folded the circle in half and in half again and used my iron and some pins to mark the 4 quarters. Then I attached the pins to the 4 quarters of the side piece. I used a lot of pins on this, probably more than I needed.
This is how the seam looked after sewing.
I sewed another half-inch seam allowance. Once I had that seam, I could have used my pinking shears to trim around the top, but I decided to just do a quick serged edge. It reinforces the seam and helps keep the circle from puckering.
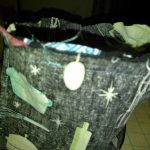
Ta Dah! A quick, easy cover for my little slow cooker!
I like to play with pattern placement.